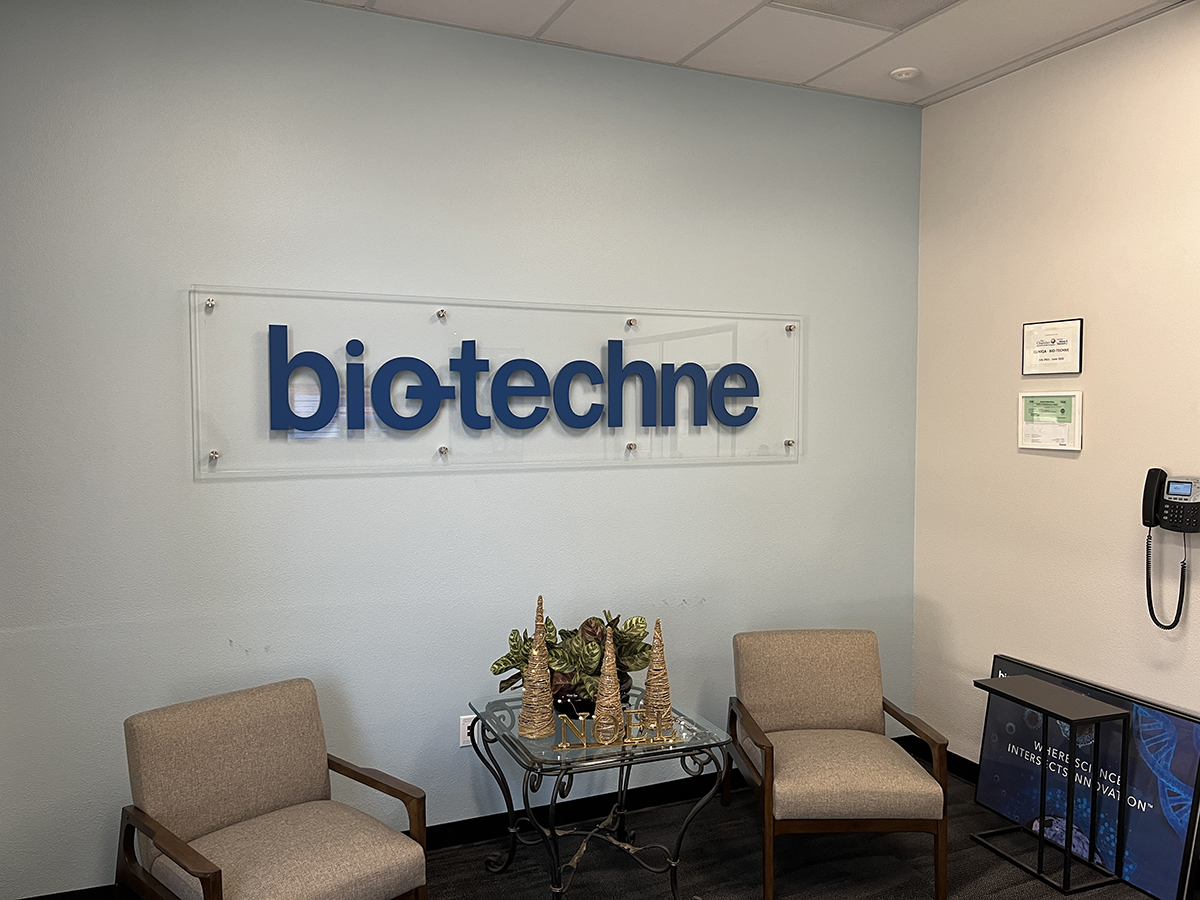
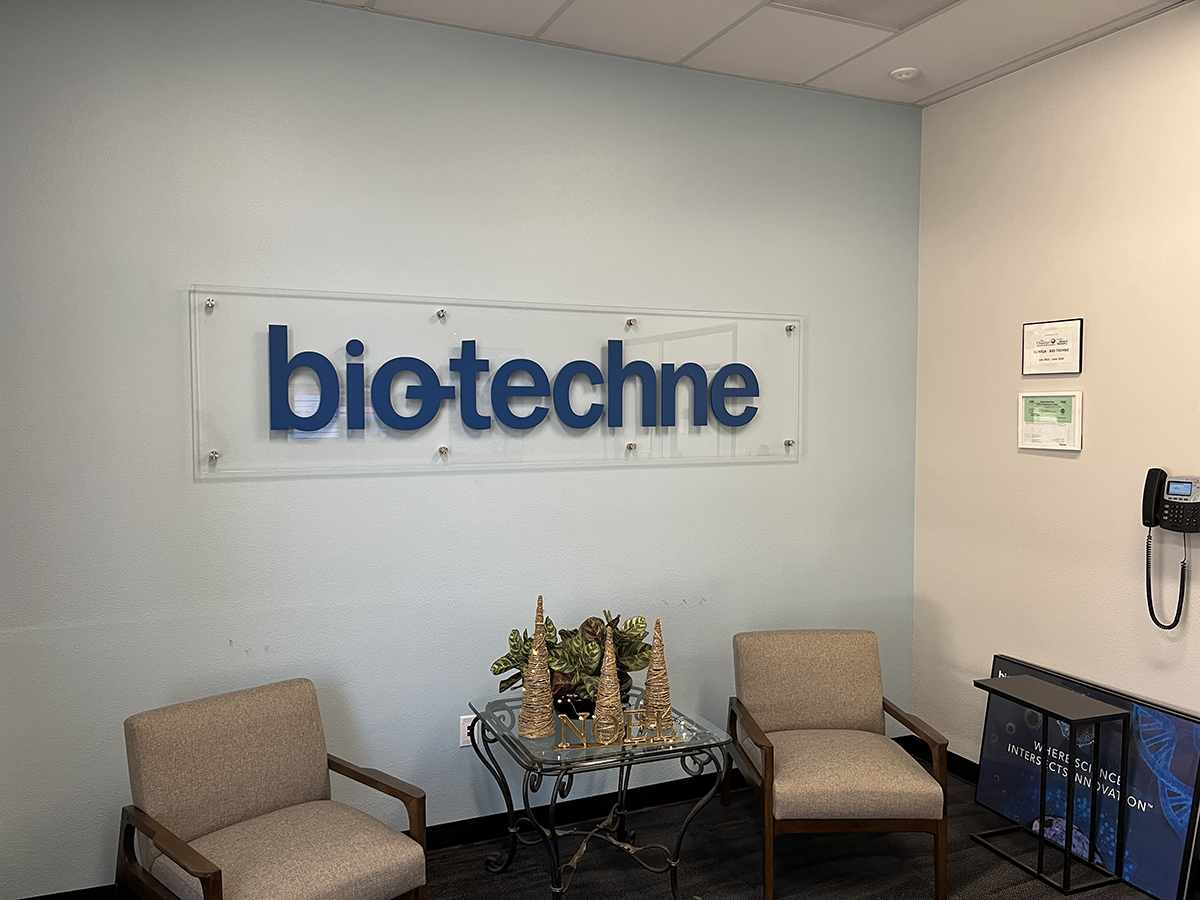
 North Coast Signs fabricated and mounted a clear acrylic panel for a San Marcos lobby, with a beveled perimeter, flame-polished edges, and eight standoffs holding it forward of the wall. From the doorway that panel is nearly invisible against the pale wall, and the standoff hardware reads as small silver points. Stand three feet away and your eye goes straight to the border. That is the part of a lobby sign that stays visible to anyone standing near it. Up close, the finish along that cut line is what a visitor judges.
What a Visitor Sees From Three Feet
Every clear acrylic panel looks the same from across a room. The difference sits at the perimeter, and you can settle it yourself on any piece of acrylic within reach. A saw-cut edge comes off frosted and cloudy, so it reads as a milky white line around the panel. A polished edge carries the same clarity and gloss as the face of the sheet, so your eye travels straight through the thickness of the panel to the wall behind it. Look at the next acrylic panel you pass at close range. You will see immediately which of the two you are standing in front of.
How a Cut Edge Comes Back to Clear
Flame polishing is how the clarity comes back. A controlled flame passes across the cut surface, the acrylic briefly melts, and the edge returns to a clear, glossy finish with no sanding slurry and no compound residue left in the cut. The flame finishes a cut that was already made true. An edge has to be sawn straight and sanded true before the flame ever touches it, because the flame locks in whatever flaws are sitting there. The finished line is therefore a direct read on the cut underneath it.
Why the Close-Viewing Trades Insist on It
Display builders, retail fixture shops, partition fabricators, and illuminated sign makers all treat edge quality as critical, because their work gets looked at from arm's length. The San Marcos panel we mounted on eight standoffs sits at exactly that distance, which is why we cut and sand it true in Vista before any polishing starts. A lobby panel belongs in the same category as that display work, because a visitor stands close to it. The people passing it at that range are the investors, recruits, and clients you walk through the building. On a colored panel, the edge reads as part of the face, and the fabrication behind it passes without a second look. Clear acrylic shows every decision that went into it, so we settle the cut and the finish before the panel goes anywhere near your wall.
The Bevel and the Polish Are Two Operations
The panel in San Marcos carries a beveled perimeter as well, and the bevel is a separate operation from the polish. Beveling cuts the edge back at an angle, so the face of the panel meets it on a slope. Polishing then clarifies whatever shape that edge has been given. A premium panel gets both operations. The clear panel on that San Marcos job is 3/8 inch thick, so the finished perimeter shows a real depth of glass-clear material. A beveled and polished perimeter picks up the lobby lighting as one bright line around the panel. The panel is cut and finished in Vista before it ever reaches your wall.
What the Finish Is Like to Live With
A properly finished edge is easier to keep looking new, since a rough cut collects dust in the marks left by the blade. The eight standoffs hold the panel off the wall, which leaves the perimeter open on all four sides and the face reachable when someone wipes it down. Together those two decisions keep the cleaning simple.
Lobby lighting differs from one room to the next, so the useful place to start is a photo of the wall and the fixtures above it. Send that photo to North Coast Signs at (760) 536-5454 with the size you have in mind. We will show you finished work close enough to put your eye to, so you can see the clarity of a polished edge and the line the bevel picks up before we build anything. From there we scope the panel, the bevel, and the standoff layout as one job.