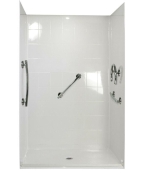
Have you noticed water damage in your shower walls? Here is what you need to do.
In older homes, water damage in shower walls isn’t that uncommon. In the past, grout and drywall were used in shower areas instead of waterproof materials. However, sometimes, poor caulking and old tiles can fall prey to rot, mold, and sub-floor leakage. Luckily, only one part of the entire shower wall is prone to water damage. If detected in the earlier stages, you can save your shower area, as well as a lot of money. The repair process is pretty simple and straightforward.
Let’s break it down.
Damage Evaluation
In the beginning, make sure to identify the source of leakage. Usually, the leakage takes place in the area where the tile comes in contact with the shower floor. Signs of water damage include mold, discolored grout, damaged caulk, and loose tiles. In case you notice these signs, water damage has taken place.
Tile Removal
After detecting water damage, start removing the tiles. Tile removal depends on the extent of damage and must be done by hand. If hand removal is difficult, use a putty knife or a pry bar for tile removal. Insert the tool from one end of the tile, and move towards the other end. Don’t go too fast, or you’ll break the tile.
Cut the Drywall
Now that the tiles have been removed, comes the part where you cut the drywall. Remove loose pieces by hand, and cut the intact drywall with a utility knife. In case the wooden studs are moldy, clean them with bleach and water solution. After cleaning, allow the studs the time they need to dry. Moldy insulation needs to be replaced right away. Also, remove the caulk from the shower pan, using a scraper.
Tile Cleaning
Before tiles are used again, they must be clear of drywall residue. Soak them in a tub of lukewarm water and house detergent. After they have soaked, and remove any remaining residue with a putty knife. If all fails, boil the tile for a bit, and remove the residue with a scraper. Don’t forget to wear safety gloves, before handling the tiles.
Cement Board Installation
The cement board should be exactly as thick as the drywall itself. The cement board should be cut to fit the wall cut out. Also, a gap of not more the 1/8 inches should be left below the drywall. Now fasten the cement board to the studs with screws. Make sure to perfectly mud and tape the joints.
Tile Installation
Apply thinset evenly to the wall before applying the tile. Now, place the tile into the thinset, and let the two cure. After they have cured, bring in the grout. Make sure not to apply any grout in the area connecting the bottom part of the tile, and the shower pan. After the tiles have been placed, caulk the joints.
These were some easy DIY tips on repairing water damaged shower walls. However, it is better to seek help from a professional restoration company like ours.
For excellent water damage restorative services, visit our website today.


