If you are looking to do your own paint touch up, the first thing to do is to get your expectations straight. I have a friend who was fond of saying paint touch up is “good from far, but far from good”. It is not meant to make the area look new again. It’s primary purpose is to retard rust from setting in, and if you happen to have chips on a plastic bumper where the contrast may be black surrounded by white paint, it will at least make it white on white. It is quite likely that your attempt may make the area look like you have fingernail polish on your vehicle. It is best for small chips, particularly on door edges & area low down, where it is not directly in front of your face, so to speak. A hood that has developed too many chips may unfortunately look like it has chicken pox if you try to get every single little imperfection. Again, your primary purpose is to get people who are a short distance away to see the whole car & not have their eyes automatically drawn towards the imperfection.
Now that that is out of the way, how do you begin? First you must locate your paint code. It is often in the lower left corner of your manufacturer’s label (often located in the driver’s door jamb). For example, a Toyota may have a paint code in the lower left corner that says C/TR: 040. The paint code is “040”. Here is an example of a Ford Ranger’s manufacturer’s label below:

The paint code is circled in red.
Your next step is to buy the touch-up paint. If you have a fairly common paint color, you may be able to find it at your local Walmart, NAPA, Checkers or other care care store. If not, you may have to call your dealership parts department. If they do not have it in stock, they may have to order it for you.
Supplies needed:
- napkin or paper towel (as lint free, but sturdy as possible)
- touch-up paint (may or may not come with built in brush &/or roller ball applicator)
- soft tip brush(es), q-tips, paint sticks (probably optional)
- dremel, rust eraser, screw, screwdriver, nail (something to remove rust, if present)
- wax & grease remover (optional-for larger chips, if not grinding out rust first)
- color reducer (optional)
- excess paint remover (optional)
It is important to catch the rust before it sets in too deeply. If the rust has been there for a while & has caused the paint to “bubble”, you may have a slightly larger problem, especially if it is on your roof where the metal is fairly thin or if it is right next too a window or weather stripping where it will quickly spread through the grooves all around the glass or rubber. At that point you may have to have a professional look at it and decide whether or not you want to put the cash into your project to take care of the problem or just let it go.
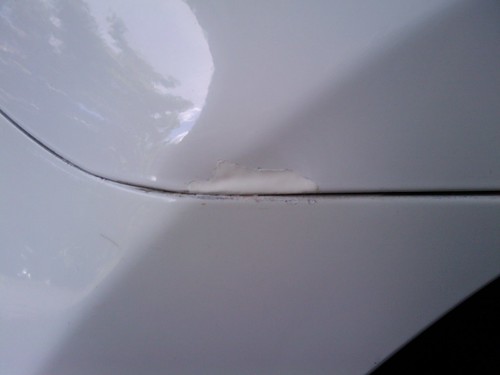
Getting back to the subject at hand. Below is an example of a small area of damage with most of the rust already ground out:
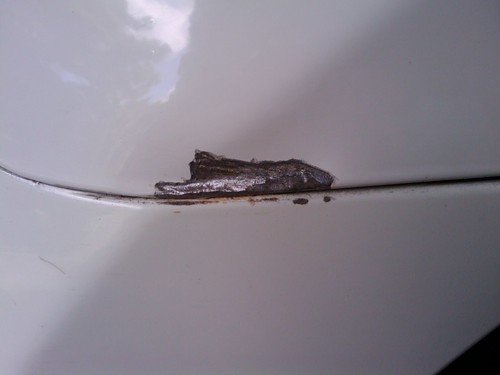
A dremel is my favored tool to remove rust, but whatever you have handy that can remove the rust without damaging the surrounding paint will work.
Once you get out all of the rust (you may have to remove a little of the surrounding paint since rust tends to work it’s way through the metal & under the paint. Look for little cobwebs or spider legs under the paint), wipe the area with your wax & grease remover if it’s a larger chip (again larger areas will not tend to look good, you will probably want to thin out the touch up paint as much as possible {color reducer} & use many thin coats if you are not using a spray gun or air brush {not included in this discussion}.
If your touch-up paint is a little old, it may have hardened somewhat. You can thin it out temporarily with color reducer you can pick up at an auto paint store, but it will probably be cheaper for you to just buy another tube of touch-up paint unless you are going to be doing this a lot. They will probably tell you that the reducer is made for a particular paint system, but for our purposes there’s a good chance anyone will do just fine. If you do have to thin it out, it’s probably best to put a small glob (of the paint) in a water bottle cap (or something similar), add a couple drops of reducer, then mix it until it’s liquid.
Next choose your tool. You want to use one that will allow you to keep within the boundaries of the damaged area, but not have to take too many strokes to finish filling the area. Here are a few common tools that are used.
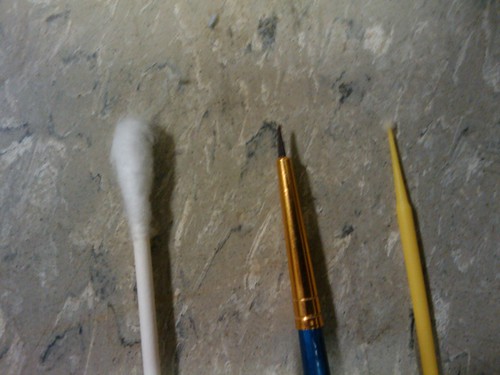
Walmart often carries a number of soft brushes in their crafts area. I sometimes use one of their very fine brushes for small chips. If you have to use something larger than the brush that usually comes with the touch-up tube, you are probably trying to tackle something a little too big for paint touch-up…unless it’s fairly low to the ground & not normally visible.
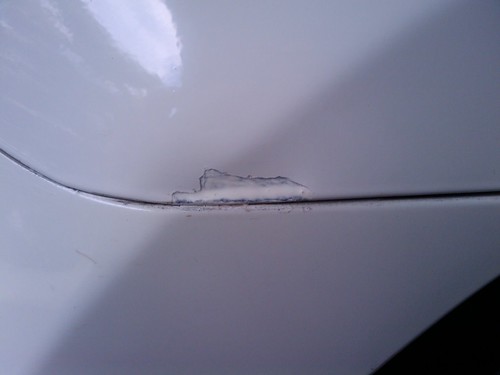
The following pictures show the touch-up on this chip after successive coats.
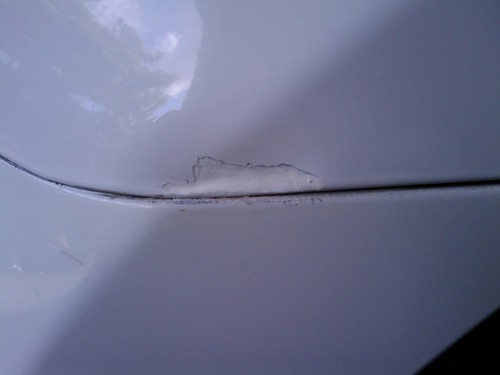

After three or four coats of touch-up paint (did not use clear coat on this one). As my friend Mark Ryan was fond of saying, “far from good, but good from far”. From a short distance away, the casual onlooker is unlikely to notice it, though the owner, who knows exactly where to look should still be able to find it relatively quickly.
Another technique would be to cover the area with more touch-up paint than necessary, let it dry for may 10-30 minutes depending on the type of paint and the amount in the location, than wipe over with excess paint remover (& possibly a plastic straight edge) until the area is flat again. You may end up “popping out” or wiping away too much paint and have to start over, but your results can be good with this method (not shown here).
Thank you for again tuning in to another episode of “Adventures in Detailing”.
Again, as always, if you have any questions, please feel free to email or call.