This blog covers #vinylgraphics tips and how to choose and install #floorgraphics.

As businesses search for creative ideas to communicate with their customers, we are right there to provide
install the latest solutions. You may think that
floor graphics are just a giant, high-quality stickers, but they can be so much more valuable to your brick and mortar store than “peel and stick.” Read on for 3 tips on how floor graphics can optimize your messaging and marketing, or call 877-330-7532 to speak directly with our Montgomery floor graphics specialists.
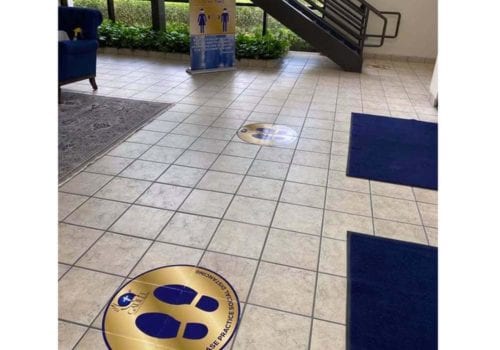
Floor graphics are inexpensive, easy to install and remove and can be applied to almost any flooring. They are great for wayfinding, branding, or big sale and event promotions, The thing to remember is that location is everything. The best locations maximize impressions while keeping your floor graphics out of harm’s way. It’s usually a good idea to place your floor graphics away from high-traffic entryways or the paths of pallets and heavy equipment.
The best surfaces for floor graphics installations include:
- Ceramic tile
- Waxed vinyl
- Sealed concrete
- Marble
- Sealed wood
- Terrazzo
- Unsealed concrete (outdoor floor graphics only)
You can always choose to install your graphics yourself and will need to assess the condition of the floor surface before you begin. Be sure to avoid installing your floor graphics on loose or uneven tile, and make sure the floor finish (e.g. concrete sealer, wood sealer, paint, or wax) is thoroughly bonded, otherwise it may separate or lift away when the floor graphic is removed. If you'd like to leave it to us we can take care of the
professional installation.
Finally, make sure the floor surface is the right temperature. Floor graphics often stiffen and crack in extreme cold, while the adhesive may fail in extreme heat. Most floor graphics do best when installed on surfaces between 50° to 100°F (10° to 38°C).
Prepare The Surface For Your Floor Graphics Installation
You’ve found the perfect spot—now it’s time to prepare it.
To clean the surface prior to your installation, follow these steps:
- Spray the floor area with a solution of 20 drops of detergent per pint of water. Avoid using soaps or enzyme detergents, which can negatively affect the floor graphics’ adhesive.
- Clean an area that is between 6 to 8 inches larger than your custom floor graphic.
- Wipe the floor area clean and dry thoroughly using a lint-free paper towel. Make sure you have removed all soil and grit before moving forward.
- If you need to remove oils from the floor area, wipe the space with a clean, lint-free towel that has been moistened with rubbing alcohol. Wipe away the alcohol before it dries to avoid leaving any residue.
Installing Your Custom Floor Graphics In Montgomery, TX
Because there’s such a huge variety of floor graphic products, there is no universal method for floor graphics installation.
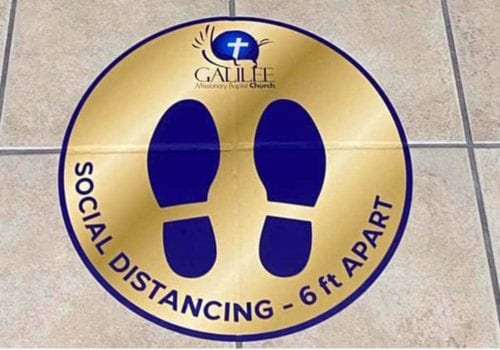
Generally speaking, the process involves the following:
- Positioning the floor graphics on the clean/dry area
- Peeling back one half of the liner to expose the adhesive, then cutting it away
- Applying the exposed adhesive with smooth, edge-to-edge squeegee strokes
- Removing the second half of the liner and repeating, using edge-to-edge strokes across the shortest distance until the second half of the graphic is applied
But rather than rolling the dice with general advice, we highly recommend contacting our floor graphics specialists for a free consultation. We can answer any installation questions you may have, provide some product-specific advice, or take care of the whole project—it’s entirely up to you, and every consultation is totally free!
For More Ideas Visit Our Gallery
Free Floor Graphics Installation Consultation In Montgomery, TX
Call 877-330-7532 or visit the
Universal Signs and Graphics website for a free floor graphics installation consultation. We proudly serve Montgomery and the surrounding communities, but our floor graphics installation expertise is available for business owners nationwide.